
Moving out is never just about packing boxes. It’s about returning the property in impeccable condition, aligning with tenancy obligations, and ensuring a smooth transition. A comprehensive end of tenancy checklist isn’t just a helpful guide—it’s your key to a stress-free departure and the full return of your security deposit. For landlords, it guarantees the property is ready for new occupants without delays or added expenses. A detailed checklist bridges expectations and results, eliminating the guesswork on both sides.
Understand Your Tenancy Agreement First
Before lifting a mop or grabbing a vacuum, read your tenancy agreement thoroughly. This document outlines specific cleaning requirements, standards of return, and the conditions under which deductions may be made from your deposit. Some landlords demand professional carpet cleaning or oven degreasing, while others accept a high-standard DIY clean. Understanding these terms early saves last-minute surprises and ensures compliance.
Decluttering and Packing Before Cleaning Begins
A cluttered space can’t be cleaned efficiently. Begin by removing personal belongings, old clothes, expired food, and forgotten storage. Clear wardrobes, cabinets, and countertops. This not only speeds up the cleaning process but also allows you to inspect surfaces that may need special attention. Packing and decluttering ahead of cleaning is a strategic move—less clutter, less chaos.
Gather Your Cleaning Supplies and Tools
Efficiency starts with being prepared. Stock up on high-quality cleaning supplies, including:
- Vacuum cleaner with attachments
- Mop and bucket
- Microfiber cloths
- Rubber gloves
- All-purpose cleaner
- Bathroom descaler
- Glass cleaner
- Limescale remover
- Furniture polish
- Scrubbing brushes.
Having the right tools at your fingertips ensures a smoother and more effective clean.
General Cleaning Tasks for All Rooms
Start with a top-to-bottom approach in each room. Dust ceiling corners, light fixtures, and surfaces. Wipe down skirting boards, baseboards, light switches, and plug sockets. Remove any cobwebs, polish handles and doors, and sanitize high-touch points. Every room should feel fresh, bright, and inviting when you’re finished.
Walls, Doors, and Ceilings: Often Overlooked Areas
Scuff marks on walls, dirty door handles, and stained ceilings are easy to miss but are frequently noted in inspections. Use a gentle cleaner to erase marks and touch up paint if necessary. Don’t forget to clean door frames and tops of doors where dust loves to settle.
Windows, Sills, and Blinds
Crystal-clear windows make a huge impression. Clean the interior of all windows, including the panes, frames, and handles. Wipe down sills and clean accumulated dirt. Blinds should be dusted or wiped, depending on the material, and curtains should be shaken out or laundered if possible.
Lighting Fixtures and Ceiling Fans
Light fixtures attract dead insects and dust. Gently remove covers, wipe bulbs (when cool), and clean fittings. Ceiling fans should be wiped blade by blade. Not only does this improve cleanliness, but it also ensures lighting remains bright and dust-free for the next tenants.
Floors and Carpets
Vacuum all carpets thoroughly, focusing on edges and under furniture. If required by contract, steam clean or shampoo carpets to remove stains and odours. For wooden or tiled floors, sweep and mop thoroughly, paying attention to corners and grout lines.
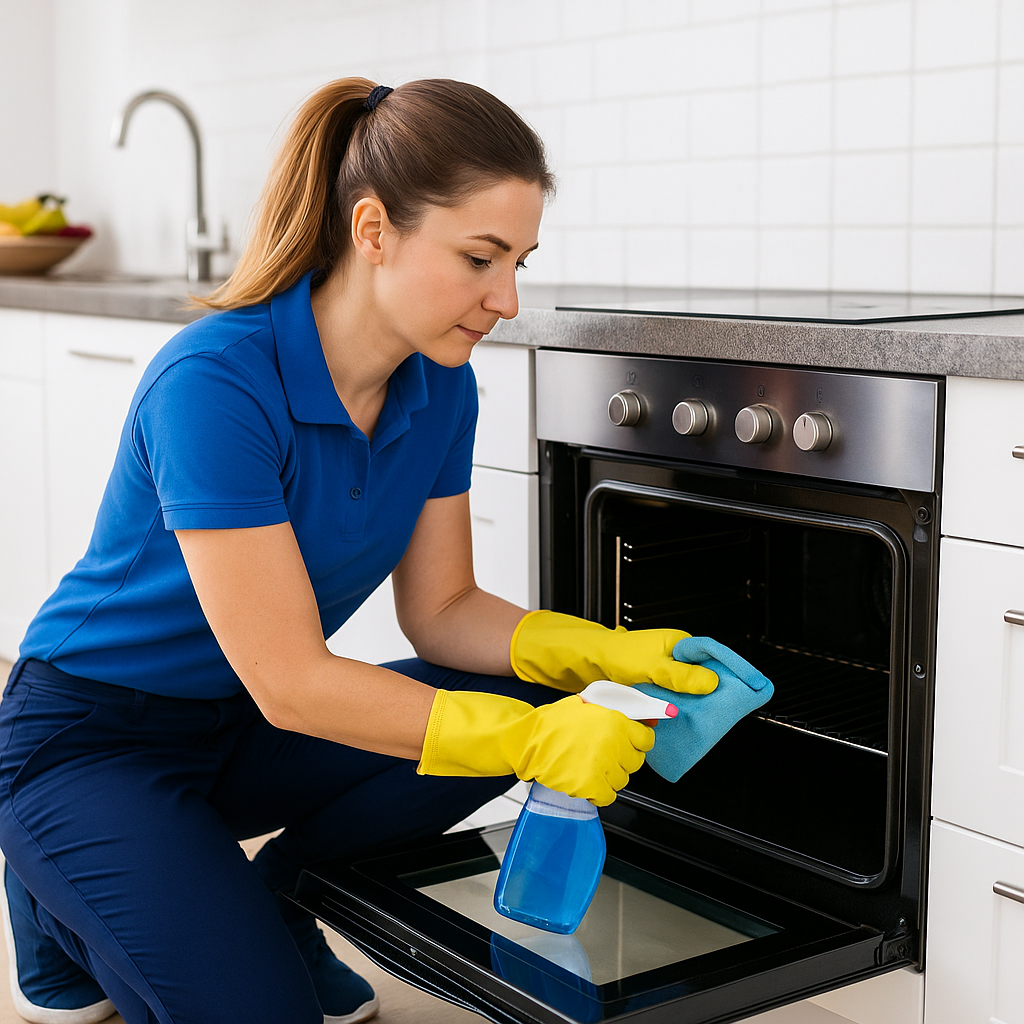
Kitchen Cleaning Checklist
The kitchen is a hotspot for inspection—don’t cut corners.
- Oven and Hob: Remove baked-on grease, clean racks, trays, knobs, and behind the appliance.
- Fridge and Freezer: Defrost fully, remove all food, clean interior shelves and seals, and sanitise.
- Cupboards and Drawers: Empty completely, wipe inside and outside, clean handles and hinges.
- Worktops and Backsplashes: Sanitise all surfaces, remove any food stains, and polish for a streak-free finish.
- Sink and Taps: Descale taps, polish the sink, and unclog drains if needed. Eliminate any lingering food smells.
Bathroom Cleaning Checklist
Bathrooms must sparkle. Attention to hygiene here is non-negotiable.
- Toilet: Scrub the bowl, base, seat, and back of the toilet. Disinfect and deodorize.
- Sink and Mirror: Remove toothpaste, clean taps, and polish mirrors until streak-free.
- Shower/Bath: Descale shower heads, scrub tiles and grout, remove soap scum and mildew.
- Cabinets and Shelves: Clear contents, wipe down interiors and fronts.
- Flooring and Ventilation: Mop floors thoroughly and clean out ventilation fans or extractor covers.
Bedroom Deep Clean
Bedrooms often seem simple, but require thoroughness. Vacuum under and around the bed. Wipe down wardrobes inside and out, including handles and top surfaces. Clean under furniture and sanitise doorknobs, mirrors, and switches.
Living Room and Common Areas
In shared areas, remove dust from all surfaces, including coffee tables, TV stands, and shelves. Clean behind electronics, sanitise remote controls, and ensure furniture is wiped or vacuumed. Remove cobwebs from corners and ceiling edges.
Cleaning Furnished Properties: Additional Responsibilities
If your rental was furnished, your job is more intensive. Clean under cushions, vacuum upholstery, polish wooden furniture, dust artwork, and sanitise all decorative items. Don’t forget to clean inside drawers or storage units provided with the furniture.
Garden, Balcony, and Outdoor Spaces
Outdoor areas must be tidy and safe. Sweep patios and balconies, clean outdoor furniture, mow the lawn if applicable, and remove all personal items or rubbish. Ensure pathways and garden beds are weed-free and visually presentable.
Rubbish Removal and Final Decluttering
Before leaving, ensure all rubbish bins are emptied, cleaned, and deodorised. Don’t leave behind bags of clothes, old electronics, or broken furniture. Any leftover items may result in deductions from your deposit or disposal fees.
Check for Damages and Minor Repairs
Inspect the property for minor issues. Patch nail holes, replace burnt-out bulbs, tighten loose cabinet handles, and check all doors for proper operation. Taking care of these small fixes can save large amounts of money at move-out.
Inventory Report and Move-In Condition Comparison
Pull out the original inventory checklist from the start of your tenancy. Walk through the property, comparing each item and space to its initial condition. Note anything you’ve improved or that may need explanation during the final inspection.
Conduct a Final Walkthrough
Once everything is clean and repairs are done, conduct a final walkthrough. Pretend you’re the landlord or letting agent. Open every cupboard, check behind furniture, and inspect with fresh eyes. Correct anything that stands out before you hand over the keys.
Get Proof of Cleaning (Especially for Professional Services)
If you’ve hired a cleaning service, request a detailed invoice and checklist of completed tasks. Take timestamped photos of cleaned areas. These serve as your evidence in case the cleanliness is disputed later.
Frequently Missed Areas That Could Cost You Your Deposit
Small oversights can have big consequences. Be sure to clean:
- Behind the toilet.
- Inside the washing machine drawer.
- Behind radiators.
- Top of wardrobes and cupboards.
- Inside extractor fans and range hoods.
- Skirting boards around furniture.
- These are the spots landlords check first.
When to Hire a Professional Cleaning Service
If you’re short on time, have a large property, or your lease requires it, hiring a professional cleaning service is a wise investment. Experts ensure nothing is missed and often provide a guarantee—helping you secure your full deposit with less stress.
Leave on a High Note and Get Your Full Deposit Back
Following a complete end-of-tenancy checklist ensures a seamless move-out and protects your finances. A clean, well-maintained home shows respect for the property and helps you leave on the best terms possible. With the proper preparation and attention to detail, your deposit—and your reputation—will remain intact.